1. Set Up

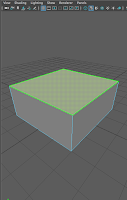
 In this example I will be using a simple cube (left) for the object and the happy face as the texture (above). So I select a face on the cube and create a new lambert. Then, in the attribute editor I select the black and white box next to the word color and select file. From there I choose the happy face texture.
2. Opening UV Editor

Now I have a cube with a texture on one of the faces. But the texture does not fit on the face. This is where we begin to use UV mapping. To open the UV editor I just selected the UV tab on the main menu and from there I just select UV editor. NOTE: The UV tab will only show up on the main menu if the menu is set to the modeling category. Now the UV should pop up as a separate tab (right).

3. Using the UV Editor
To use the UV Editor I select an edge and simply move it within the UV Editor screen until the texture lines up correctly with the face. The end result has the texture fitting on the face.
Using UV Mapping we have created a very happy cube!


No comments:
Post a Comment